What are we building?
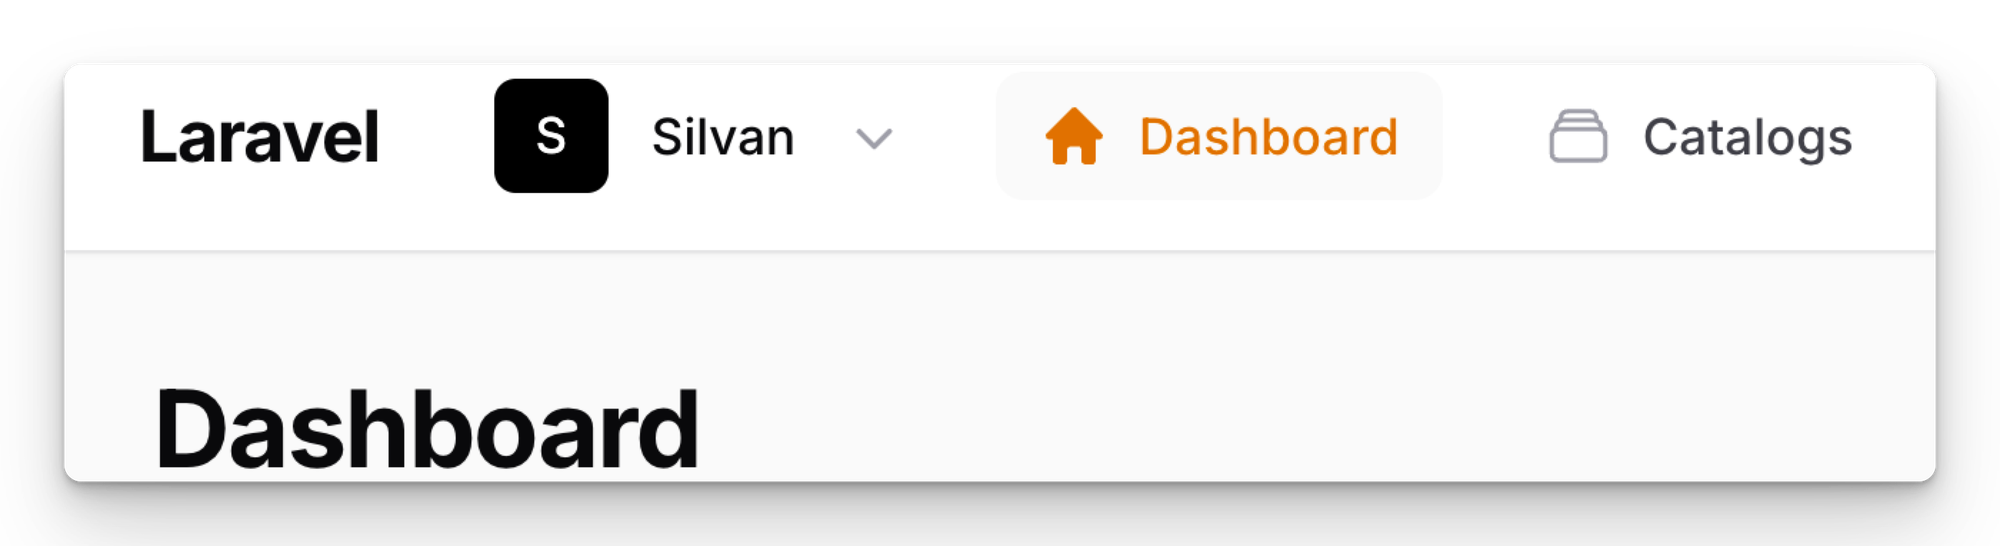
I really like the navigation design in Laravel Cloud using a mix of drop-downs and breadcrumbs so you know where you are.
In the Content Catalog, a multi-tenant Filament app with nested resources, I wanted something like this for the longest time.
Now with Filament v4 offering nested resources and the ability to provide your own topbar component, I gave it a shot. So far, our users like the new approach.
A quick note before we start
Basic setup
To get us started, I setup a new Filament v4 app with the following models:
- Team (the tenant model)
- Catalog (the model that has related resources)
- Link (sample related model for our case)
These are the Filament resources:
- CatalogResource
- LinkResource (nested within the CatalogResource)
For ease of use, you can use my demo repo, each branch represents a step. We are at step 1.
Switch to the top bar in the Filament Panel Provider
Making sure you use the Topbar component in Filament is done by adding the topNavigation() method to the $panel.
In our setup, it will look something like this:
That's not yet what we want, so next we will create our custom Topbar Livewire component.
Custom Topbar Livewire Component
Start by making your own Livewire component:
php artisan make:livewire CustomTopbarThis will create two files, a blade view and a Livewire component class in the project. In the custom-topbar.blade.php add some dummy content, like this:
<div>
    Hello CustomTopbar
</div>
Register the component in the panel
To make this work with the Filament panel, add the following to the AdminPanelProvider
use App\Livewire\CustomTopbar;

return $panel
    // your other stuff
    ->topbarLivewireComponent(CustomTopbar::class)
Nice! You just registered your custom Livewire component to be used as the topbar in Filament. Yes, it doesn't look like much yet, but you could add whatever you want in there.
You can check out the current branch in the demo repo.
Building the Custom Topbar
Because I wanted to keep most of the features that the original topbar provided, I copied both the contents of the blade and the class into the custom topbar and started making it my own.
Here is the class file, the only changes so far:
- Namespace
- Classname
- View in the render method
Let's move on to the interesting part. You can find the code up to this point in the demo repo.
Making it our own
This involves a few steps, including your own custom theme for the Filament panel. So let's go through them:
Create a custom theme
Follow the steps in the official Filament docs:

Change the theme.css to include the sources containing our custom component and blade view:
@import '../../../../vendor/filament/filament/resources/css/theme.css';

@source '../../../../app/Http/Livewire/**/*';
@source '../../../../app/Filament/**/*';
@source '../../../../resources/views/**/*';
Make sure you run npm run build again.
Change the custom topbar blade view
Now, let's make some changes to the custom-topbar.blade.php file to prepare our navigation:
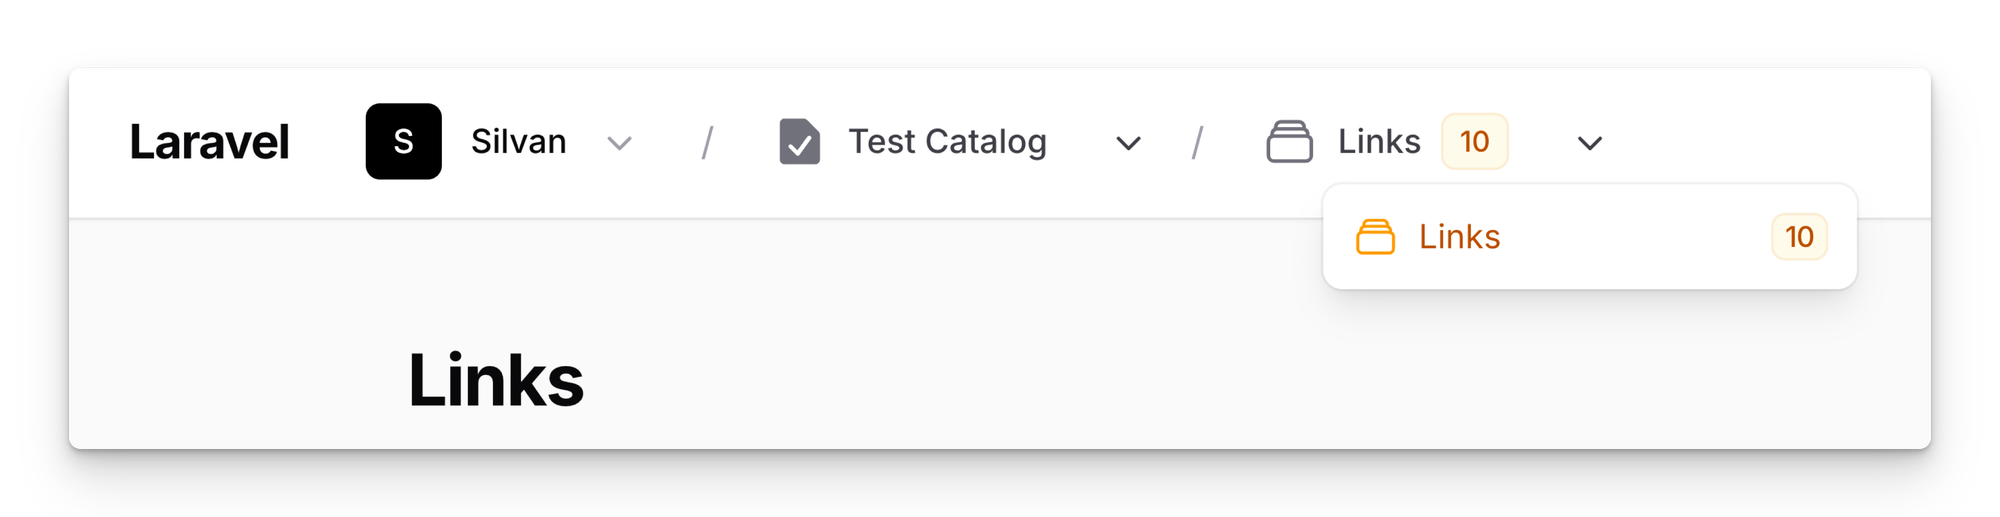
As you can see, we will be using the NavigationGroup to distinguish between the individual item sections with the /. You can check out the changes to the file in this commit.
Currently, the navigation will look something like this. It's not yet what we need, but we are getting there:
You can find the code in this branch on the demo repo. Let's build out the navigation groups next.
Building the navigation groups
At the time of writing, I haven't found an easy way to automatically register the nested resource pages as either child items or in their own navigation groups. We rely on the navigation() method in the AdminPanelProvider, so let's build that next:
Notes on the code:
It uses the original_request() helper introduced in Filament 4 to check the request. As you can see, the comparison is not strict because it returns the $catalog->id as a string.
In the Content Catalog, we have some additional checks for $user->current_team_id so we only load the catalogs for the active tenant and the catalogs have an attribute is_active, so we only load catalogs in use.
For smaller screens, we currently fallback on the sidebar, which is fine in most cases. I might be changing this in the future and will truncate the names or only show the icons.
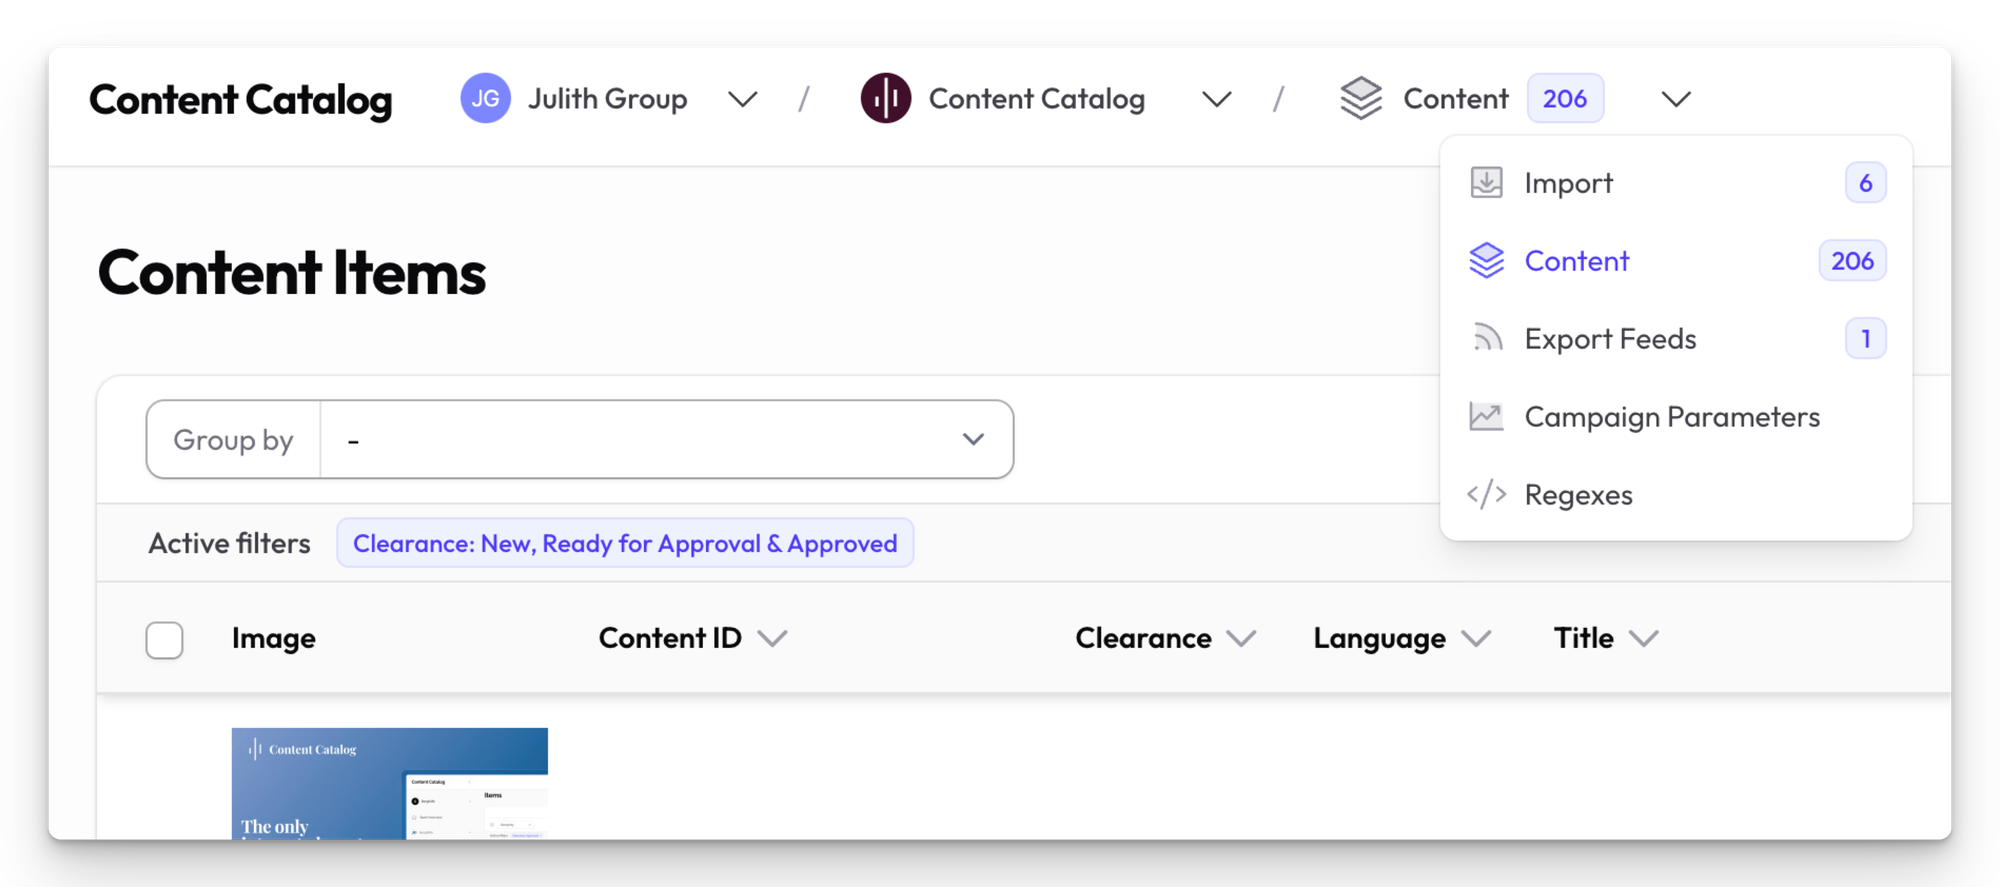
With the code in place, the result will look like this:
The last segment is not shown when you are not in a nested resource of the CatalogResource. You can check out the complete code in the demo repo.
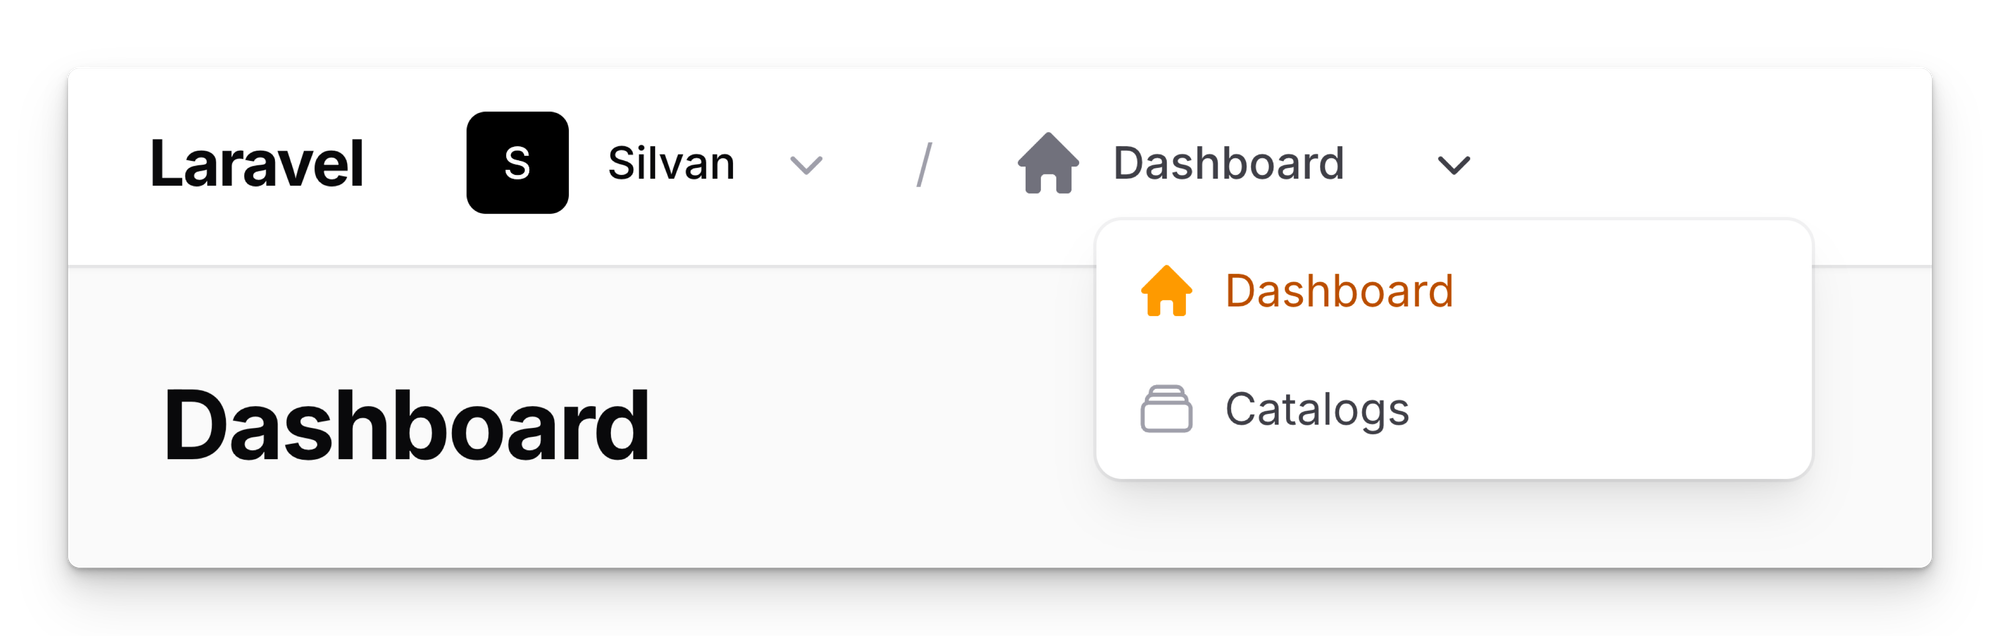
Bonus: Custom tenant menu
Right now, we are using the original tenant menu Filament provides out of the box, but it behaves differently as the entire item opens the dropdown. Instead, we want to link the tenant name to the Dashboard page and have only the arrow open the dropdown.
Let's fix this by creating a custom tenant switcher:
Now you only need to replace the original tenant menu in the custom-topbar.blade.php and you are good to go.
You can find these changes in the demo repo.
Potential optimization and tips
- Copy the code from the demo repo, the gists don't show the entire code
- Use the automatically registered navigation items
- Extend the NavigationBuilder