I recently started a Youtube channel and as my tool of choice for the editing workflow I decided on DaVinci Resolve. It has all the pro features needed and it's free to use (there is a paid version available).
Let’s get started with the color tools
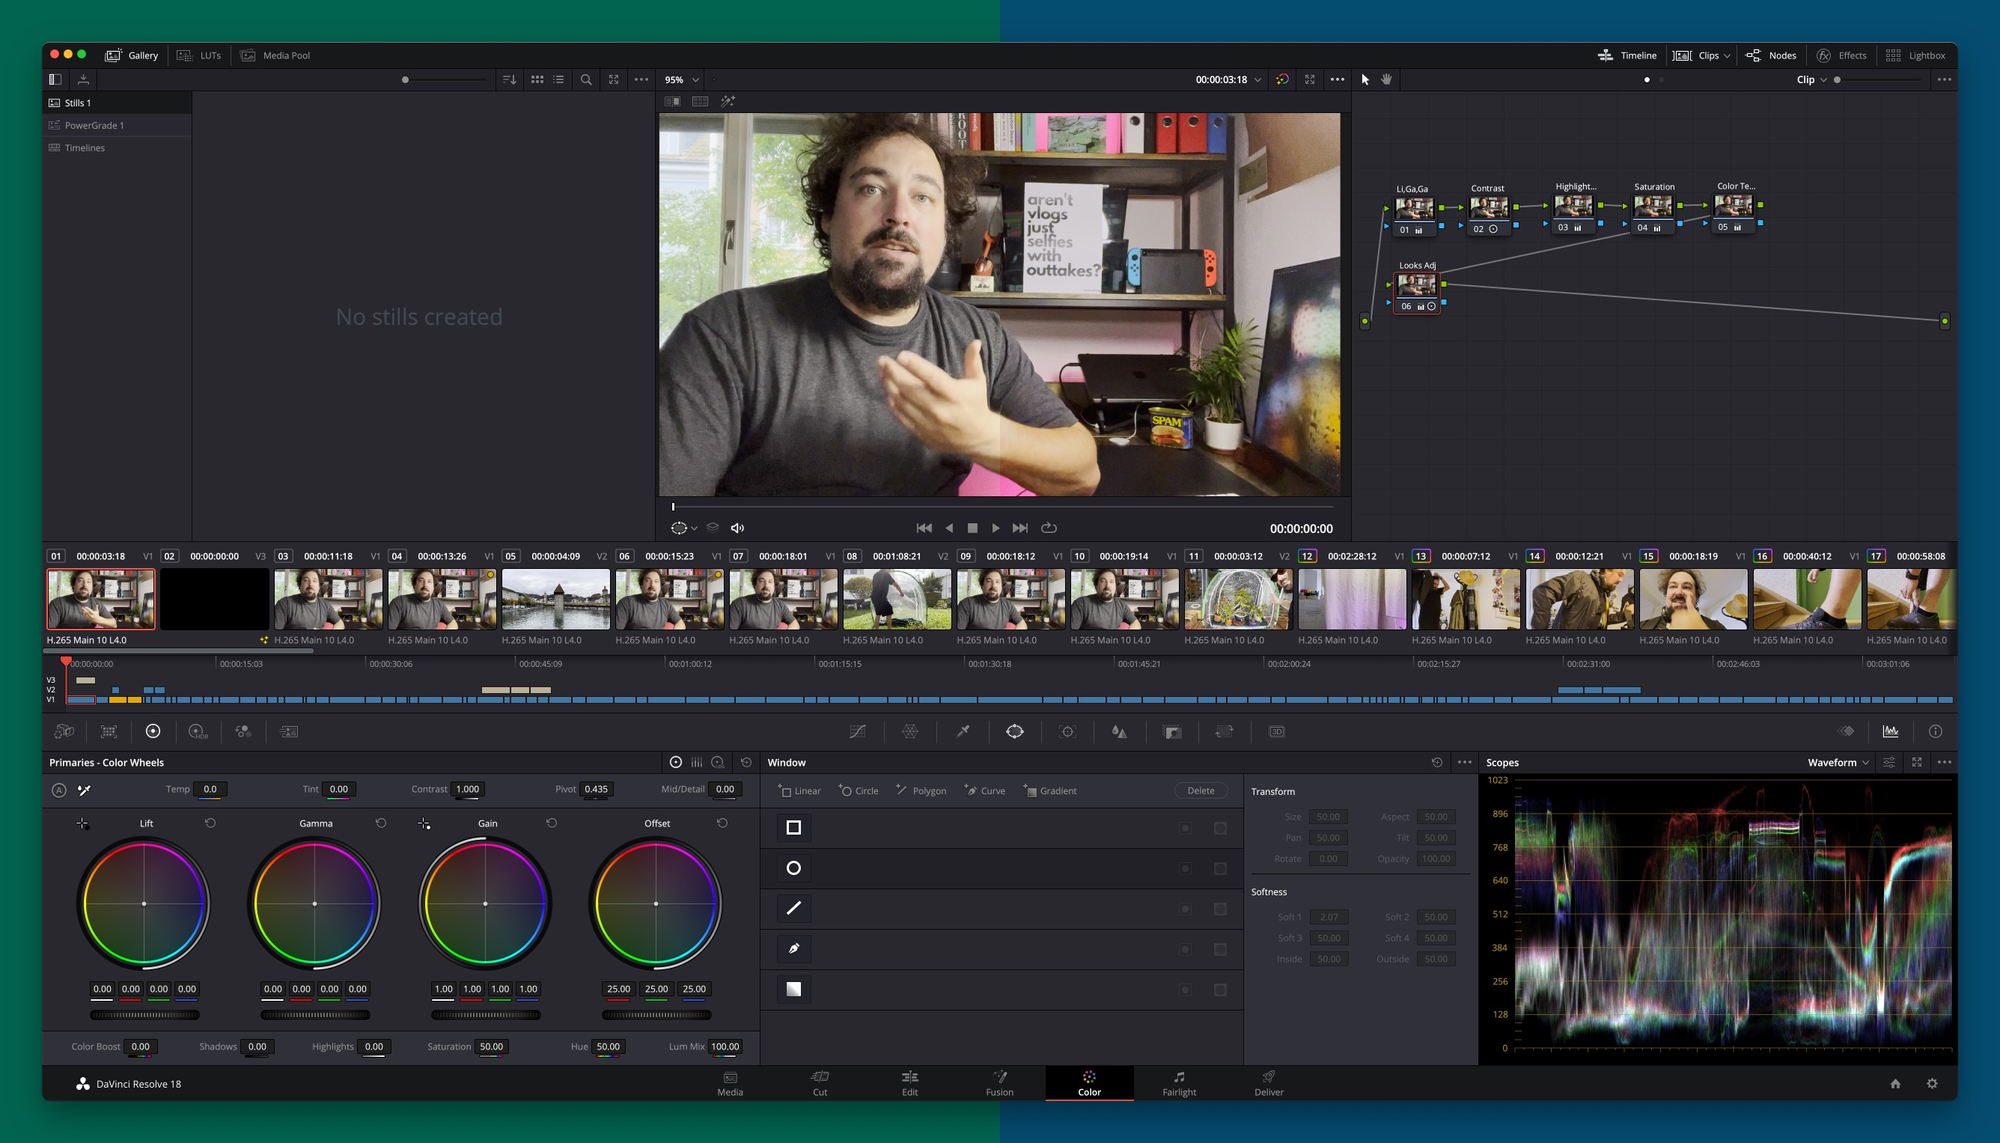
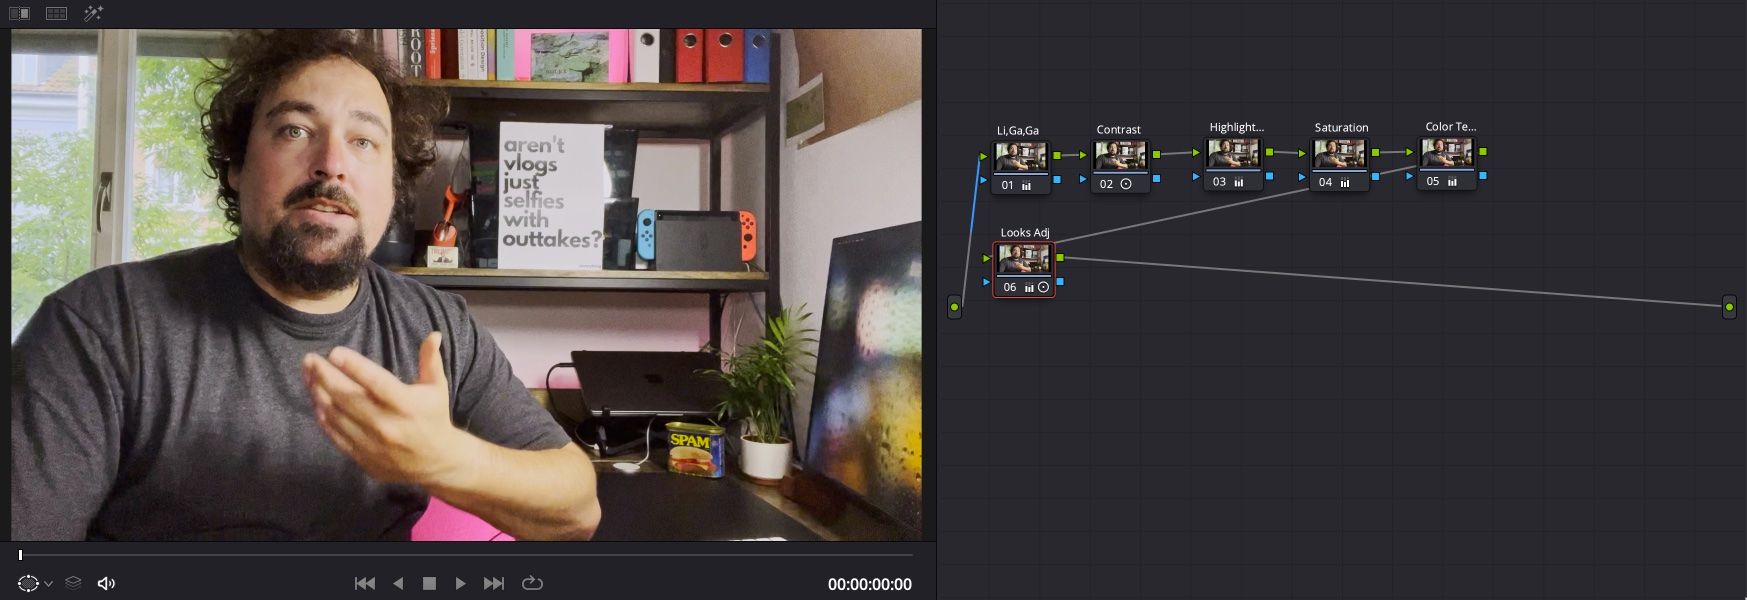
DaVinci Resolve is a node based software, other tools like Photoshop call them layers, but it’s basically the same thing. This is a simplified explanation as DaVinci Resolve offers tons of different node types, but you get the gist.

Make sure to turn on the waveform in the right bottom corner. The way waveforms work, 0 tells you how rich your black or shadows are in a shot. The top of the waveform are your highlights (gain) and the rest in between is everything else. When you let the clip play, you can see how the waveform is changing. So it’s basically a different representation of your clip.
The coloring cheatsheet
You usually will go back an forth between the nodes once you start to add them to your image. I usually go back to the first node after setting the up the second node to adjust the gain and gamma to make the image pop a bit more. Of course color is a very subjective thing, but you can tell the difference, so find the look you like.
On your first node: “Lift, Gamma & Gain”
Right click the node and rename it to “Lift, Gamma, Gain” so you know what you did in this specific node.
Adjust the lift so the waveform is almost touching the bottom, usually you have to lower the lift to achieve this.
All nodes off: Press option + D to turn all nodes off at once.
Viewer mode: Press command + F to toggle the fullscreen mode for the clip.
Second node: “Contrast”
Create a second node and find a sharp image in your clip to adjust the contrast.
Once you are happy with the result. Adjust the Pivot a little bit to make it even better. Think of the pivot as a way to fine tune the contrast.
Now go back to your first node and adjust the gain so the brightest part of the image almost touches the top of the waveform.
Still on the first node, go ahead and adjust the gamma to make the image pop a bit more.
The third node: “Highlights & Shadows”
In Resolve the highlights and shadows refer to the brightest whites and darkest blacks of your clip. In another program they might call them whites and blacks.
Adjust the highlights first and go to the shadows next. They allow you to get a little bit more detail out of the image.
Node four: “Saturation”
Play around with the saturation just a little bit, you will mostly see this in skin tones, reds and greens in your clip.
To go even further, use the color boost in the bottom left corner. It will increase the saturation, but only in the darkest areas of the image. This step is entirely optional.
Fifth node: “Color temperature & tint” or white balance
Depending on your footage, this is mostly a stylistic choice. In this node adjust the Temp first and go with the Tint next.
On node six and beyond: “The look adjustment”
Once you are pretty happy with the look of your footage, we can add one additional node just to play around with all the settings to tweak them a little more. Maybe your image could use a little brightness after the adjustments before. Feel free to adjust all the settings until you are happy with the look.
Feel free to create multiple look adjustment nodes and turn them on and off using command + D to get a feel for it. This is great if you want to share multiple looks and get feedback on them.
Saving a look as a PowerGrade
- Make sure on the top left in DaVinci Resolve you are in the Gallery tab.
- Select the “PowerGrade” item in the list on the left.
- Right click on the clip in the viewer and select “Grab still”
Congratulations, you are now done with your primary adjustments.
Secondaries with Windows
For most projects you will be fine without this, but if you want to get that little extra or adjust only parts of your image, let’s say a face or the color of an object.
Create an additional node using option + S and on the bottom drawer of Resolve you should see “Window” neatly stuck between the color wheels and the waveform.
Think of windows as masks in Photoshop, you can create all kinds of masks and adjust the colors only within this mask.
Matching all clips
All the looks saved as stills or PowerGrades can now be dragged onto another clip. Simply drag the still on another clip and drop it on the first node to replace it.
Now you can go over and adjust the look by changing the nodes for each clip, while keeping the overall style.
Summary
Remember colors are very subjective and everyone sees the world with a different set of eyes. Keep practicing with different shots or look at your favorite movies and try to get the basic coloring from them.
Keyboard Shortcuts
- Node on/off:
command + D - All nodes off:
option + D - Create new node:
option + S - Toggle fullscreen viewer:
command + F - Show/hide parts effected by a window:
Shift + H
Nodes
- Lift, Gamma and Gain
- Contrast
- Highlights and Shadows
- Saturation (and color boost)
- Color temperature and tint (white balance)
- and beyond: The look adjustment and Windows
Want to get really good at DaVinci Resolve?
There are tons of amazing resources for all levels of editing with DaVinci Resolve. Blackmagic Design, the company behind it, has a ton of free tutorials and guides on their site.
What really made things click for me in terms of color editing with DaVinci Resolve was Fred Trevinos Color Grading: An Absolute Beginner's Crash Course on Skillshare.